> ## Documentation Index
> Fetch the complete documentation index at: https://langchain-5e9cc07a-preview-eugene-1763577327-bfe51c2.mintlify.site/llms.txt
> Use this file to discover all available pages before exploring further.
# Studio
This guide will walk you through how to use **Studio** to visualize, interact, and debug your agent locally.
Studio is our free-to-use, powerful agent IDE that integrates with [LangSmith](/langsmith/home) to enable tracing, evaluation, and prompt engineering. See exactly how your agent thinks, trace every decision, and ship smarter, more reliable agents.
## Prerequisites
Before you begin, ensure you have the following:
* An API key for [LangSmith](https://smith.langchain.com/settings) (free to sign up)
## Setup local Agent server
### 1. Install the LangGraph CLI
```shell theme={null}
# Python >= 3.11 is required.
pip install --upgrade "langgraph-cli[inmem]"
```
### 2. Prepare your agent
We'll use the following simple agent as an example:
```python title="agent.py" theme={null}
from langchain.agents import create_agent
def send_email(to: str, subject: str, body: str):
"""Send an email"""
email = {
"to": to,
"subject": subject,
"body": body
}
# ... email sending logic
return f"Email sent to {to}"
agent = create_agent(
"gpt-4o",
tools=[send_email],
system_prompt="You are an email assistant. Always use the send_email tool.",
)
```
### 3. Environment variables
Create a `.env` file in the root of your project and fill in the necessary API keys. We'll need to set the `LANGSMITH_API_KEY` environment variable to the API key you get from [LangSmith](https://smith.langchain.com/settings).
Be sure not to commit your `.env` to version control systems such as Git!
```bash .env theme={null}
LANGSMITH_API_KEY=lsv2...
```
### 4. Create a LangGraph config file
Inside your app's directory, create a configuration file `langgraph.json`:
```json title="langgraph.json" theme={null}
{
"dependencies": ["."],
"graphs": {
"agent": "./src/agent.py:agent"
},
"env": ".env"
}
```
[`create_agent`](https://reference.langchain.com/python/langchain/agents/#langchain.agents.create_agent) automatically returns a compiled LangGraph graph that we can pass to the `graphs` key in our configuration file.
See the [LangGraph configuration file reference](/langsmith/cli#configuration-file) for detailed explanations of each key in the JSON object of the configuration file.
So far, our project structure looks like this:
```bash theme={null}
my-app/
├── src
│ └── agent.py
├── .env
└── langgraph.json
```
### 5. Install dependencies
In the root of your new LangGraph app, install the dependencies:
```shell pip theme={null}
pip install -e .
```
```shell uv theme={null}
uv sync
```
### 6. View your agent in Studio
Start your Agent server:
```shell theme={null}
langgraph dev
```
Safari blocks `localhost` connections to Studio. To work around this, run the above command with `--tunnel` to access Studio via a secure tunnel.
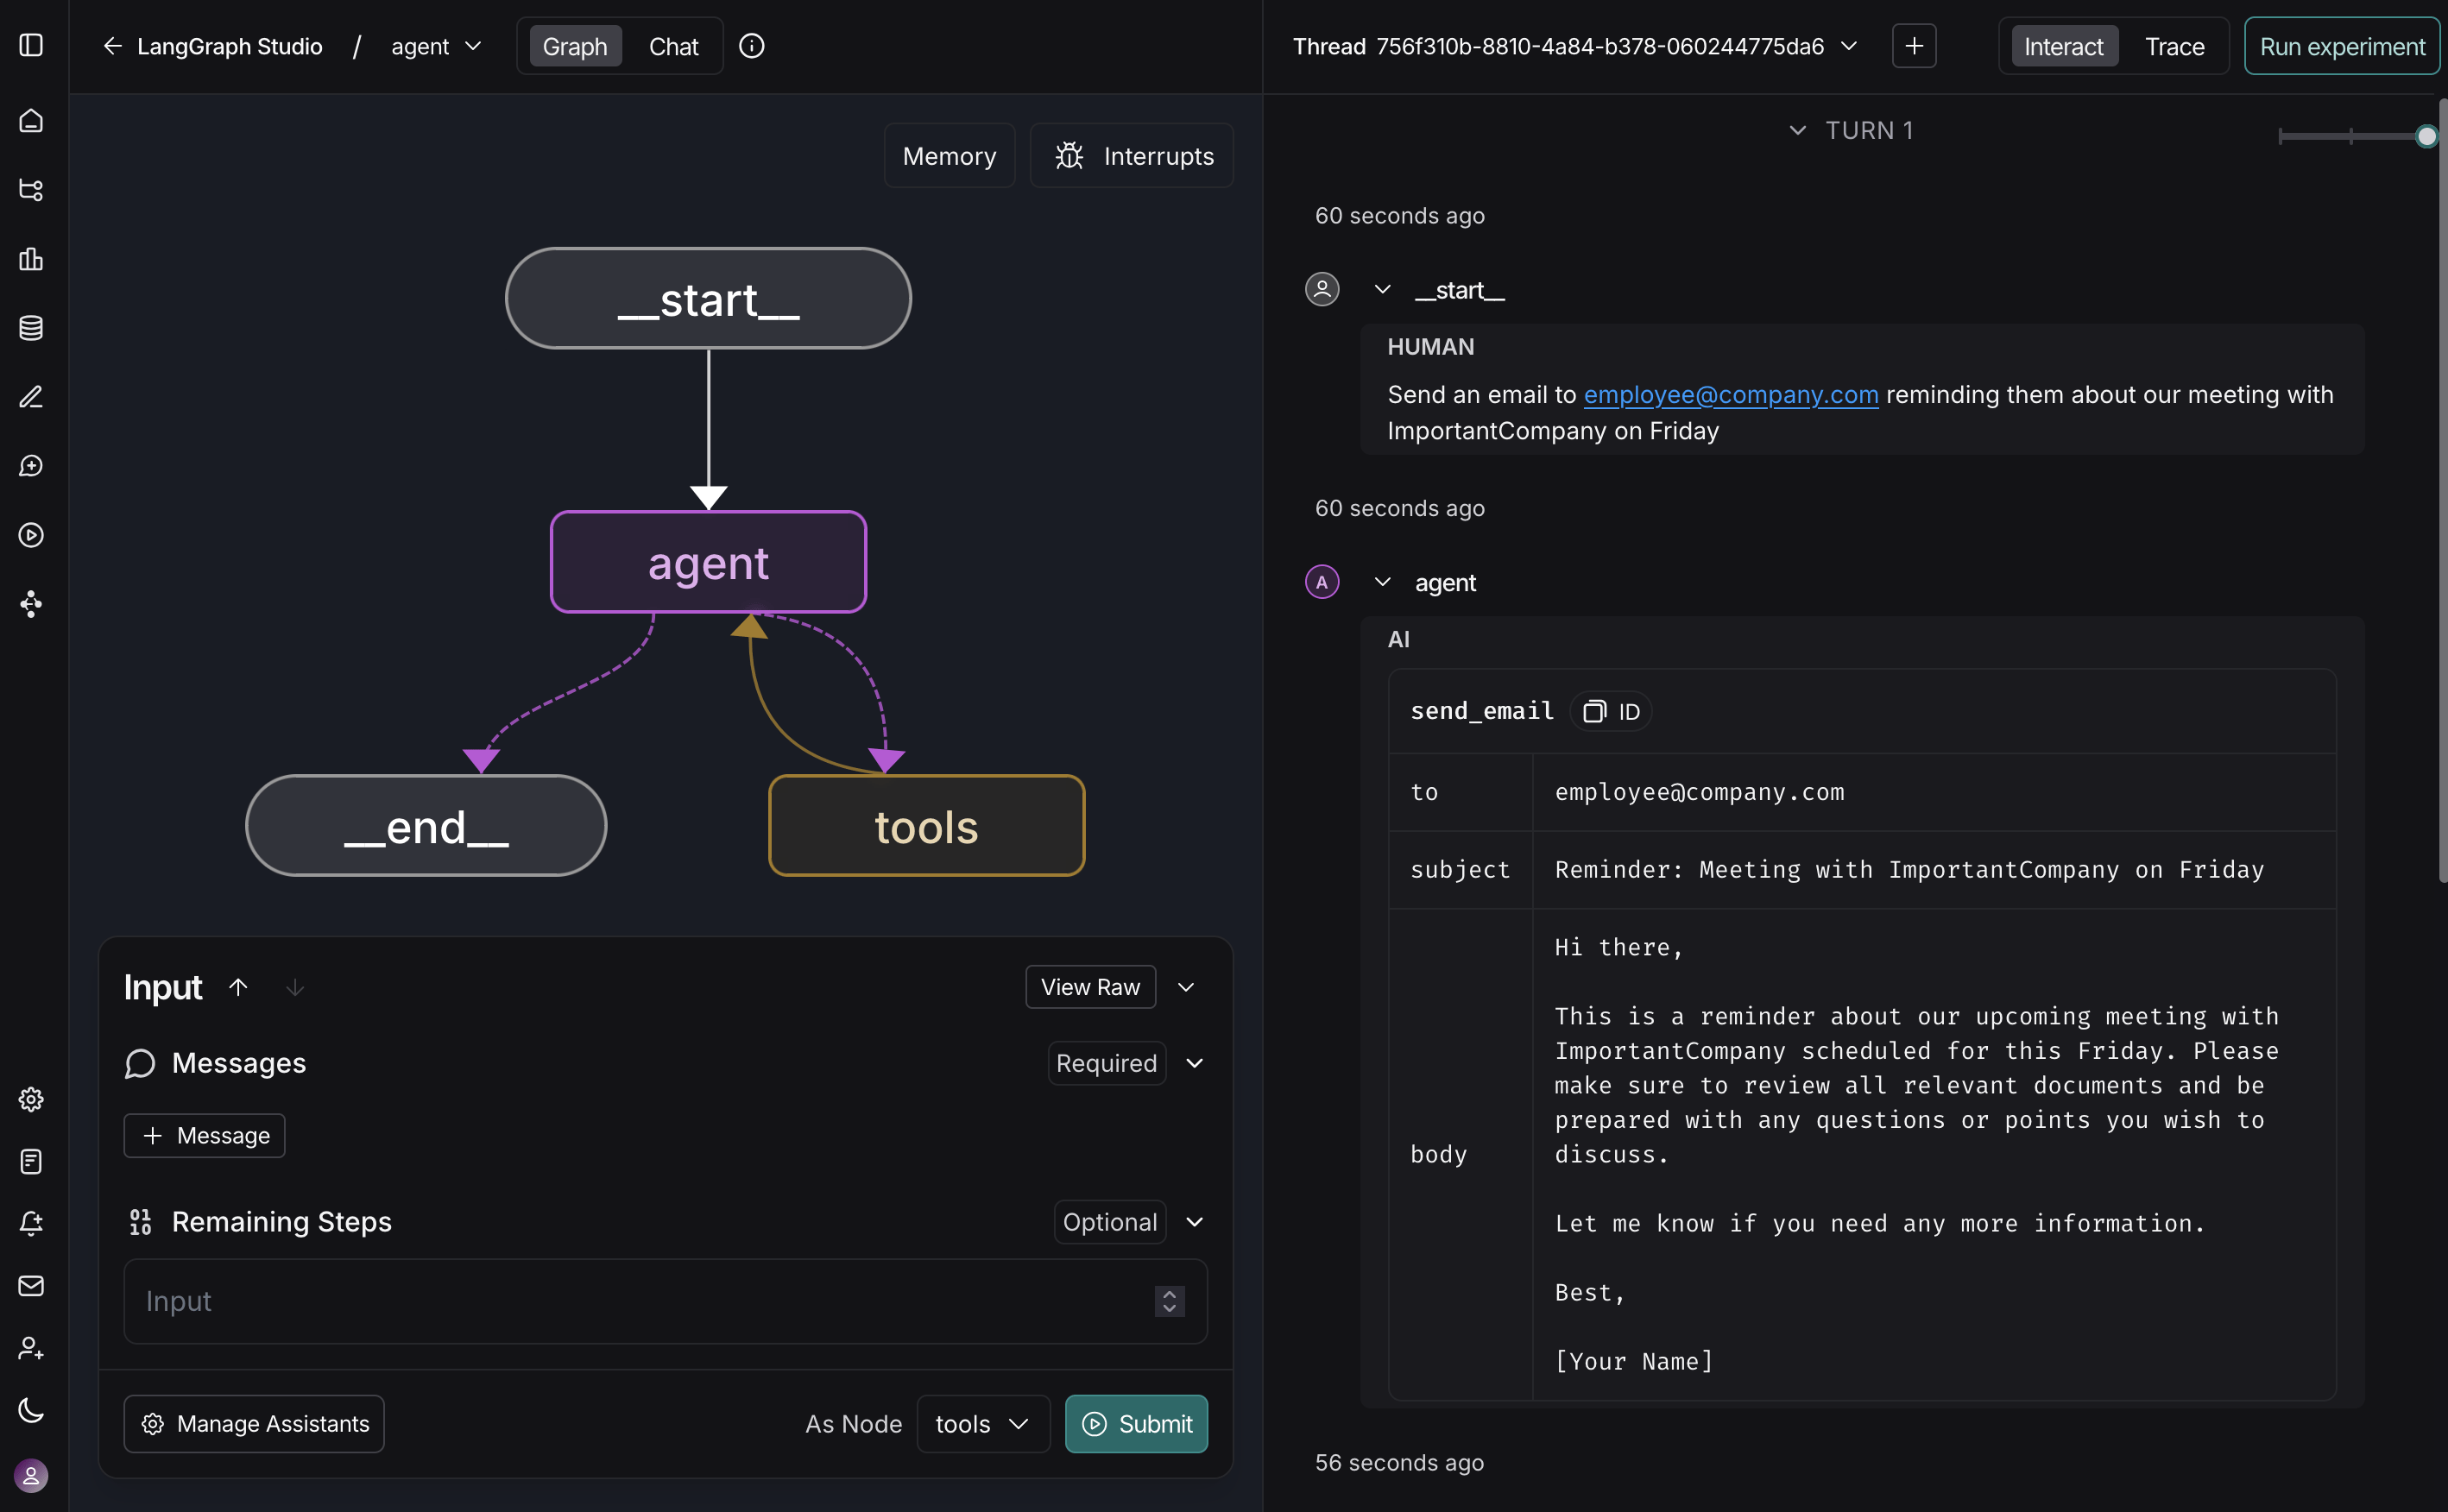
Your agent will be accessible via API (`http://127.0.0.1:2024`) and the Studio UI `https://smith.langchain.com/studio/?baseUrl=http://127.0.0.1:2024`:
Studio makes each step of your agent easily observable. Replay any input and inspect the exact prompt, tool arguments, return values, and token/latency metrics. If a tool throws an exception, Studio records it with surrounding state so you can spend less time debugging.
Keep your dev server running, edit prompts or tool signatures, and watch Studio hot-reload. Re-run the conversation thread from any step to verify behavior changes. See [Manage threads](/langsmith/use-studio#edit-thread-history) for more details.
As your agent grows, the same view scales from a single-tool demo to multi-node graphs, keeping decisions legible and reproducible.
For an in-depth look at Studio, check out the [overview page](/langsmith/studio).
For more information about local and deployed agents, see [Set up local Agent Server](/oss/python/langchain/studio#setup-local-agent-server) and [Deploy](/oss/python/langchain/deploy).
***
[Edit the source of this page on GitHub.](https://github.com/langchain-ai/docs/edit/main/src/oss/langchain/studio.mdx)
[Connect these docs programmatically](/use-these-docs) to Claude, VSCode, and more via MCP for real-time answers.
 Studio makes each step of your agent easily observable. Replay any input and inspect the exact prompt, tool arguments, return values, and token/latency metrics. If a tool throws an exception, Studio records it with surrounding state so you can spend less time debugging.
Keep your dev server running, edit prompts or tool signatures, and watch Studio hot-reload. Re-run the conversation thread from any step to verify behavior changes. See [Manage threads](/langsmith/use-studio#edit-thread-history) for more details.
As your agent grows, the same view scales from a single-tool demo to multi-node graphs, keeping decisions legible and reproducible.
Studio makes each step of your agent easily observable. Replay any input and inspect the exact prompt, tool arguments, return values, and token/latency metrics. If a tool throws an exception, Studio records it with surrounding state so you can spend less time debugging.
Keep your dev server running, edit prompts or tool signatures, and watch Studio hot-reload. Re-run the conversation thread from any step to verify behavior changes. See [Manage threads](/langsmith/use-studio#edit-thread-history) for more details.
As your agent grows, the same view scales from a single-tool demo to multi-node graphs, keeping decisions legible and reproducible.